Easy Classroom Planting Activity for Kids (Perfect for Spring Science & Life Cycles)
Looking for a simple classroom planting activity? This easy, hands-on plant lesson teaches life cycles and the water cycle while creating a fun mini greenhouse students love!
Christina Henderson
3/23/20262 min read
We’ve already talked about the benefits of having plants in the classroom but what about letting students plant their own?
It’s one of those activities that checks all the boxes:
✔ Hands-on learning
✔ Science integration
✔ Minimal prep
✔ And SO much student excitement
Plus, it ties perfectly into lessons on the plant life cycle and the water cycle!
🌱 Why This Planting Activity Works
This simple planting activity turns your classroom into a mini greenhouse—while giving students a front-row seat to how plants grow 🌿
Even better? Students can actually see the water cycle in action!
🛒 Supplies You’ll Need
This activity is super low-prep and budget-friendly. Here’s what you’ll need:
🌱 Seeds (These are quick germinating seeds so the kids don't have to wait long)
🌱 Plastic water bottles (recycled from home 🙌)
🌱 Watering Can or small cups for watering
💡 Teacher Tip: I love using plantable seed cups so students can later transfer their plants right into the ground!
I keep many of these supplies in my classroom year round as I use them for other things, but if you are looking for my top Amazon must haves you can find that list HERE
✂️ Step-by-Step Directions
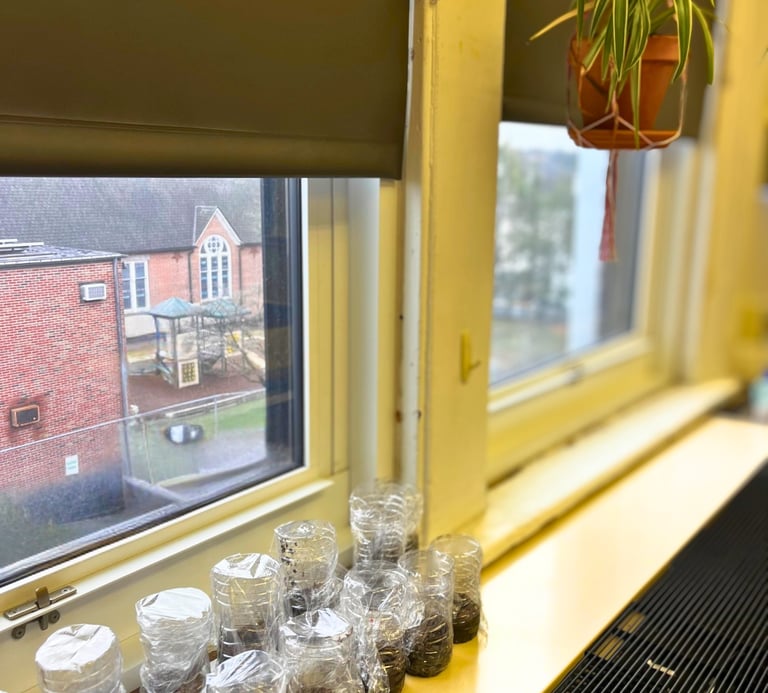
1. Prep the Water Bottles
Cut each water bottle about ¾ of the way up.
Good news—regular scissors work just fine and don’t leave sharp edges!
2. Add the Seed Cups
Place the seed starting cups inside each bottle and fill them with soil.
✨ This is always a favorite part—kids LOVE getting their hands dirty!
3. Plant the Seeds
Have students:
Poke a small hole in the soil
Drop in 2–3 seeds
Cover gently with dirt
4. Water the Plants
Let students water their plants using:
A marked cup OR
A small watering can
💡 Tip: Pre-mark a line so they don’t overwater!
5. Create the Mini Greenhouse 🌧️
Cover the top of the bottle with plastic wrap.
This is where the magic happens ✨
As water evaporates and collects on the plastic wrap, students can:
👉 Tap the top
👉 And watch it “rain” back down!
This is a perfect visual for the water cycle in action.
🌸 Bonus Idea: Turn It Into a Mother’s Day Gift
This activity doesn’t just stop at science…
It easily turns into a meaningful Mother’s Day project 💐
Students can:
Decorate the bottles
Add a tag or note
Take their plant home as a gift
If your kids liked this check out the other hands on activities my class did!
Quill Craft that ties into history
📌 Don’t Forget to Save This for Later!
This is one of those activities you’ll want to come back to every spring 🌿
Make sure to save it and pin it for later!